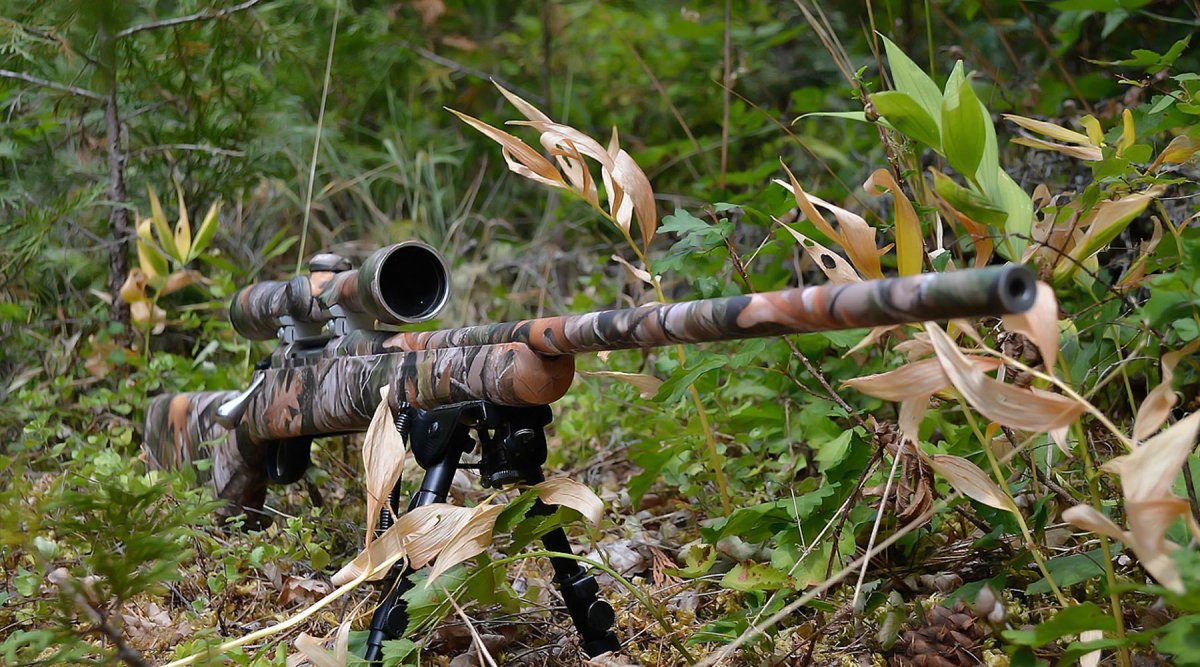
How to Install A Gun Skin Camo Wrap on Your Firearm

What is a Gun Skin?
GunSkins are Do-It-Yourself camouflage wraps that you can apply to rifles, shotguns, pistols, AR-15s, AK-47s, and pretty much any other firearm and accessory. They're waterproof and are non-permanent. They serve the practical purpose of adding protection to both the firearm and you. On top of that, they also make the gun look at least 10 times better.
They're a great alternative to gun dipping and come with a limited lifetime guarantee. Hunters, military personnel, collectors, and gun enthusiasts will love to see their guns transformed from ordinary to extraordinary.

You've got a gun skin, now what?
Maybe it was a birthday gift you received or maybe it was gift to yourself (you deserved it, right?). However you came to the possession of a gun skin is off topic. The purpose of this article is to instruct you about installing the gun skin, step by step. We'll look at each step and offer tips and tricks along the way. For some firearms it's easier than others, but all of these steps apply to pretty much anything you want to wrap.
Let's get started.
What You Will Need

Before you begin, let's go through a brief list of tools that will help you install your gun skin. Aside from having your gun/gear and the gun skin kit, you may also need:
- A razor knife
- heat gun (blow dryer)
- light duty degreaser
Step 1: Degrease and Disassemble
First thing we need to do is disassemble the gun. While it's possible to install a gun skin on a fully assembled firearm, it's easier to do it in pieces. Every gun will be different but try to remove and separate as many parts as you can.
Next, we want you to degrease the gun. We do not recommend using rubbing alcohol. Make sure to be thorough in cleaning every area you intend to wrap. Some guns, AK-47s for example, are known for being notoriously dirty guns. Dirt and grease tend to settle in crevasses and cracks.
A clean gun makes for a clean install.

Step 2: Peel & Stick
Tips
- Don't forget to set the gun to safe
- Re-position material as necessary
- Use heat to stretch material to conform around edges
- Use a sponge or foam to press against pins
- Take your time, don't rush it
Every gun skin camouflage wrap kit is made out of high performance vinyl. It's like a very durable and high quality sticker. The material is adhesive on the underside. You simply peel off the material, place on the surface of the firearm, and press firmly with your fingers. If you placed the material incorrectly the first time, it's okay to peel it off and simply try again.
Most of our gun skin kits come with pre-cut pieces for receivers, buttstocks, barrels, grips, etc. Additionally, there is always extra material to be used on large areas and miscellaneous parts (ie. trigger).
Although our gear skins do not contain pre-cut pieces, they have enough material to cut and place material on virtually anything, from a simple binoculars to complex objects such as paintball guns. Gear skins are really the "for everything else" kind of camouflage wrap.

Step 3: Trim Excess Material
Every rifle, shotgun, and pistol is unique and come in varieties of shapes and sizes, some minor while others are significant. Our gun skin kits have enough material to make up for these differences. Chances are, there will be extra material hanging off the edge or overlapping other material after you've place it. This is where the knife comes in.
Carefully trim the excess material using the razor knife. Always angle the blade outward and away from you. When overlapping material, such as for the barrel, we recommend cutting the edges with a meandering "S" shape cut. This allows for the pattern to blend seamlessly.

The Most Important Step
Installing a gun skin is really a cycle of cutting, peeling, placing, and more cutting. Heat helps to stretch the material to conform around edges and difficult corners. The more heat you apply to the material, the more flexible it becomes.
Which leads me to the most important part of the installation:
POST HEAT

Heating the gun skin and pressing firmly with your hands helps to solidify the bond between the gun and the gun skin. We recommend spending at least ten minutes on this. The more time is spent on this step, the better the gun skin will be able to protect your gun.
That's it! Congratulations to your gun, looking sharp in a new gun skin.
However much camouflage you put on the gun is entirely up to you. Some people choose to wrap the entire thing, while others pick and choose to their taste. Wrapping a gun in camouflage will not interfere with the functionality of the firearm in any way. There is also no residue left over should you choose to remove the gun skin.

Gun skins can easily take hours to install properly. Our pros at GunSkins can install a gun skin in less than an hour, but these guys have been doing this for a while. It also depends on how complex the firearm is and how comfortable you are with peeling and trimming vinyl.
We hope this install tutorial has helped you install your gun skin properly. If you don't own a gun skin yet, hopefully you won't be intimidated by it after seeing how easy it is to install. Gun and gear skins are great investments. They protect your gun at home, and they protect you on the field.


0 comments